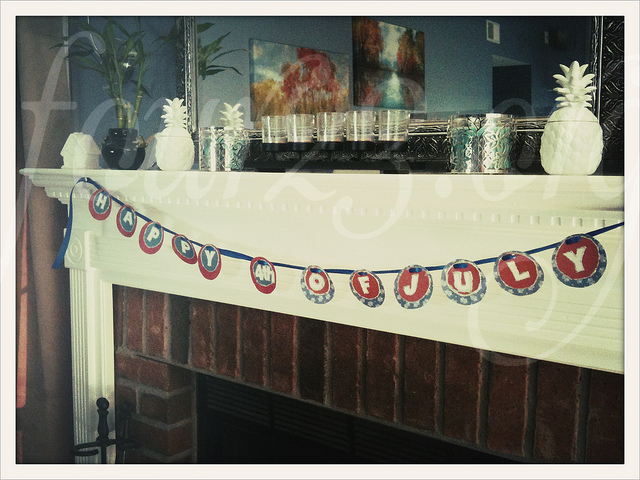
See that cute and festive little thing up there? I made that! And while it was super easy to do, I am still proud of myself because I have been amazingly crafty and productive lately and little things like that make me realize that I can be crafty without it taking up a lot of time. (This was inspired by something I saw on Pinterest – I guess it’s easy to make things once the actual inspiration is there).
This is a really easy project that you can whip together in a few hours.
Here’s what I used:
- Cardstock (in solid colors) – I bought as 12×12 Colorbok variety pack from WalMart
- Patterned paper – Also a 12×12 variety pack from WalMart
- Stick-on Letters – bought from Michael’s in the scrapbooking section
- Elmer’s 3-D Glitter Glue Pens – had this but I’m sure you can get in the office supply section almost anywhere
- Ribbon
- Elmer’s glue sticks
I knew I wanted it to spell out “Happy 4th of July!” so I took two different sheets of pattern paper (one red and one blue) and traced six circles on the back of each piece of paper (for a total of 12 circles) using a dog food can as a template (i.e. a normal sized can). I wanted the pattern paper as the background because I knew it might be difficult for letters to stand out on a patterned background.
I then took two sheets of card stock (red and blue) and traced six smaller circles on the back of each one (also for a total of 12).
I then cut out all of the circles and laid them out in a pattern, alternating the red patterned background with the blue solid cards stock and vice versa. Once everything was laid out, I took the plain white scrapbook stickers and spelled out “Happy 4th of July” on the circles (note: I put 4TH all together on one circle).
I then used the glue stick to glue one circle to the other (it was what I had and it worked pretty well).
Once that was dry, I used the 3-D Glitter pen in silver to trace the outline of the center circle and each letter.
Then, I stupidly tried to bring the tray of wet letters into to show Steve and ended up dumping half of them on the floor, thus smearing all of the glue and getting glitter everywhere (note: don’t repeat this step).
Once I let the glitter glue dry for about a day (it would probably take less time but I had to add more glue and because it’s “3-D” it can be kind of think – plus, I kind of forgot about it until the next day), I used a hole punch to make two holes about 1/2 inch apart at the top of the circle. I really eyeballed the distance but it basically just needed to be close enough to where the ribbon fits nicely through.
Then I strung the circles on the ribbon, coming up from the back through the first hole and going down from the front into the second hole.
A couple of thumbtacks later and voila! A festive Fourth of July banner.
I love being crafty!


No Comments